Wednesday, August 22, 2012

Pesto-Chicken Stuffed Shells

Can you tell we're into pesto right now?  Haha.  Here is, yet another pesto-involved recipe!  I got this one from another blog I found via Pinterest, but tweaked it to my honeybunchesofoats's liking :)

Below I will post the original recipe and italicize what I changed for our two-person and not yet growing family.

Ingredients

1 box (12 ounce) Jumbo Pasta Shells -- I sorted out and cooked enough shells for us to realistically eat, it probably cam to a max of between 10 - 12 shells.

For the Sauce:

1/4  cup unsalted butter  -- 2 Tablespoons of butter
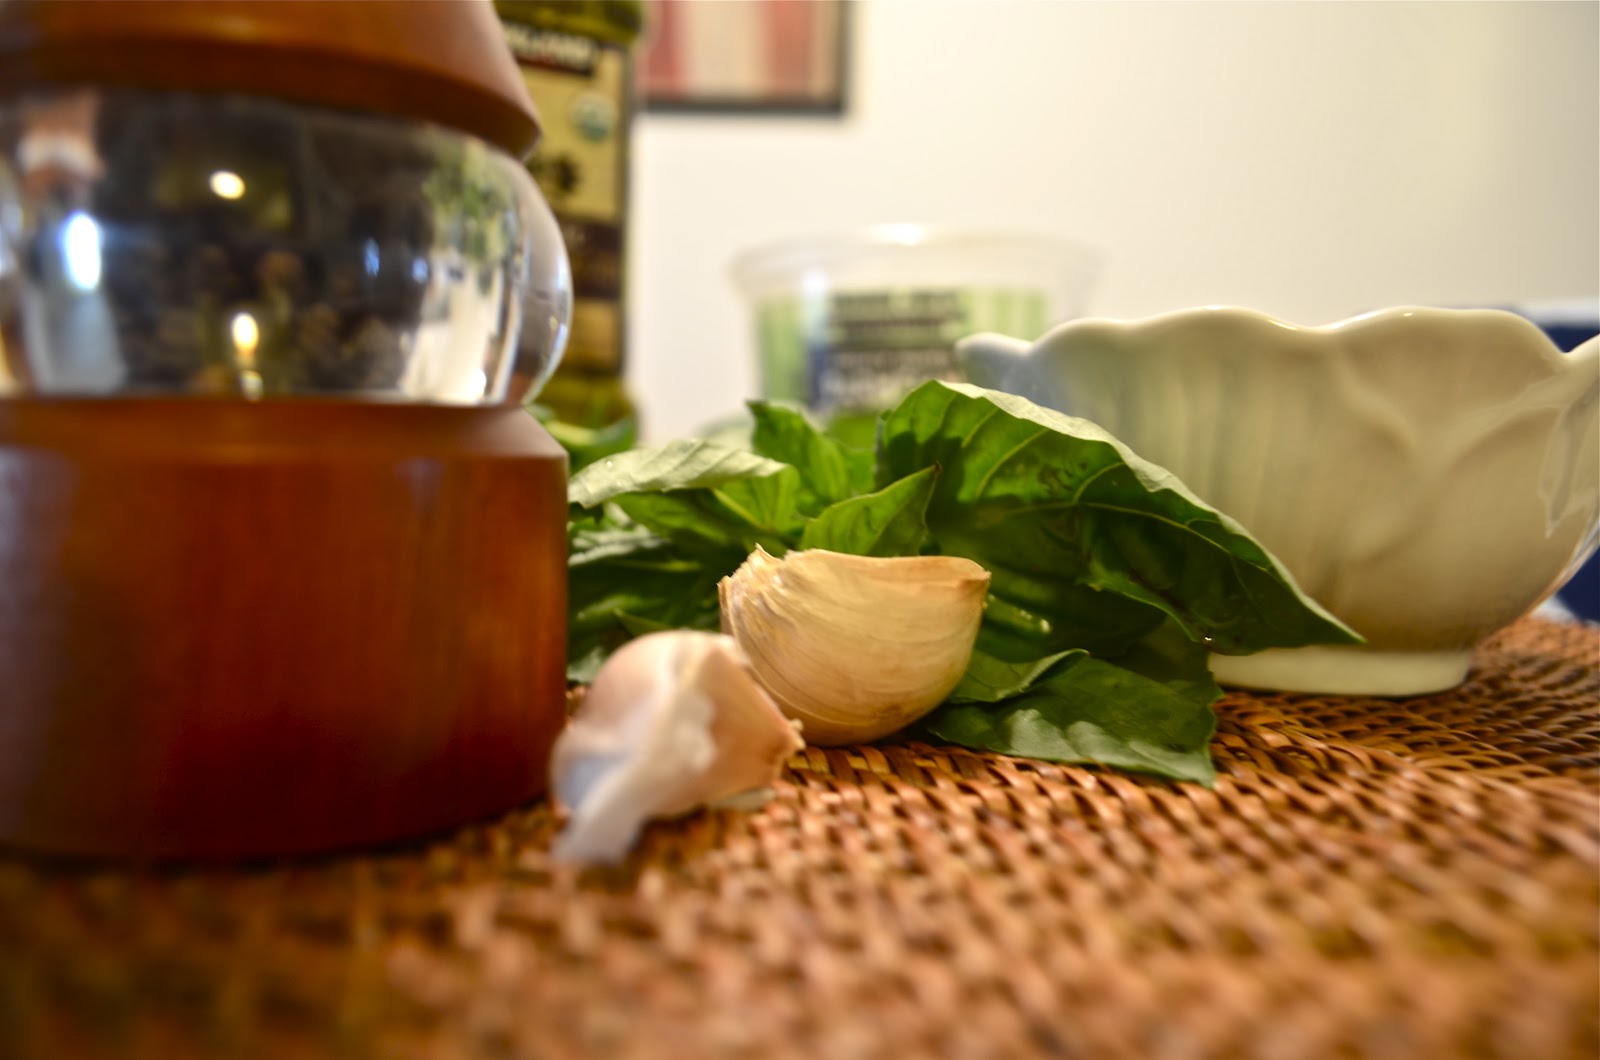
2  cloves garlic, minced (1 teaspoon)  -- garlic powder and salt to taste will suffice if you don't have fresh garlic on hand
1/4  cup flour  -- 2 Tablespoons of flour
3  cups whole milk or 1/2 and 1/2  --  3/4 cup milk
1/2  teaspoon Frank's hot sauce  --  paprika or cayenne to taste
1  cup grated Parmesan cheese  -- 1/2 cup of whatever cheese you have on hand (I usually use a blend), for this recipe mozzarella or parmesan would be best, but I didn't have parmesan so I used cheddar and it was still quite yummy.
A handful of mozzarella or parmesan for the top

For the Filling:
1  tablespoon olive oil
1/2  cup red pepper, finely diced
1/2  cup onion, finely diced
1 1/2 pounds boneless skinless chicken breast, cooked and diced
2  cups (8 ounces) shredded Italian Cheese Blend Cheeses,divided
1 container (7 ounces) Basil Pesto  --  1/4 - 1/3 cup of the aforeposted homemade pesto
1/2  teaspoon dried Oregano
** For this part I used one chicken breast chopped, chopped onions, and diced baby zucchini.  Use whatever vegetables you like or have on hand.  Broccoli would be yummy in it too!  I just used what I had and what would fit in color-wise for my child husband who does not eat veggies.  You can use whatever italian herbs and spices you want for this part. **


Instructions
Cook the pasta in boiling salted water until al dente.  Drain and set aside.

For the sauce: While the pasta is cooking, melt the butter in a medium saucepan over medium heat.  Add the garlic and saute for a minute or two until fragrant.  Whisk in the flour and continue cooking over medium heat for about 2 minutes until bubbly.  The consistency should be pretty thick and paste-like.  Slowly add the milk in parts  --  this will help the roux make the sauce thicken quicker and heat up the milk at a more even temperature without scalding it.  Once the white sauce has started to thicken (about a medium consistency - leaves residue on your finger but not a terribly thick) add the cayenne or paprika and more salt/garlic to your liking.  Continue to stir and thicken until just barely boiling.  Remove from heat and stir in the grated cheese.


For the filling: Heat olive oil in a medium sized skillet, add red pepper and onion and saute for about 3 minutes until soft.  Remove sauteed veggies from heat.  Mix sauteed vegetables with the chicken, 1 1/2 cups Italian Blend Cheese, basil, and pesto.


In a lightly greased casserole dish or cast iron pot place about 1/2 of the sauce in the bottom of the dish.  Fill the jumbo pasta shells with the filling and place in the dish. Spoon the remaining sauce over the shells, cover the shells as much as possible with the sauce so they don't dry out when cooking.  Sprinkle with remaining cheese on top. Bake at 350 degrees for 30 minutes or until the cheese on top begins to brown (I did 15-20 because our amount was about 1/4-1/3rd the size of this recipe)

Bon Appétit


This is great with some garlic bread or rolls.  I made us a couple slices of garlic bread out of the homemade rustic artisan potato bread from Sunday Night.  And my mister had a coke, he sure has one heck of  a sweet tooth!

Thanks for stopping by :)

I apologize for the lack of pictures, I didn't think about capturing this one until after the fact.  It's really easy to make though.  I'll update next time I make it :)

Thanks for stopping by!!

Love,
Mrs. Fosson

Monday, August 20, 2012

Pesto-Ranch Chicken-Zucchini Bake

So I found this little diddy of a recipe via Pinterest.  While I did not make the recipe exactly as stated by Mrs. Happy Homemaker I did follow the basic outline for her recipe.  Below are the ingredients according to Mrs.HH, the itallics are my input and the instructions are my twist on her recipe.  Enjoy!!

Ingredients

  • 1 (16 oz) box of penne pasta  -- I used two cups of penne since I was only cooking for two
  • 1/2 cup ranch dressing  -- I used 1/4 cup
  • 1/4 cup prepared pesto -- I used about 1/4 cup, to be honest I didn't measure the pesto, I went by taste
  • 2 cups mozzarella cheese  -- I used about 1/4 cup - you can use parmesan as well . . . I actually think it might be better, mozzarella gets stringy when hot, mozzarella is best for topping pasta bakes, not putting in the sauce
  • 1 cooked chicken breast, chopped
  • 1 zucchini, diced
Instructions
  1. Preheat your oven to 350 degrees F
  2. In a pot, cook the penne al dente, about 5-7 minutes in boiling water depending on the pasta & strain
  3. In the same pot combine pesto, ranch, chicken, and zucchini until desired taste
  4. Add the pasta back into the pot and mix until pasta is thoroughly coated with sauce
  5. Add 1/4 to 1/2 of the cheese to the pasta and mix until melted
  6. Sprinkle remaining cheese on top
  7. Bake for 5 - 10 minutes or until the top is golden

Doesn't that look good though?!?!

So, you say you don't like ranch?  First of all, your lying.  Everyone likes ranch, what you don't like is the mayonnaise base and fat.  Well good news for you!  Ranch can be substituted easily with ingredients like plain chobani yogurt and seasonings - there are thousands of substitutes.  Don't believe me?  Go check google, or realistically -  pinterest it!  I'm not the biggest ranch fan either - but once in a while it's ok to be guilty :)

Thanks for stopping by!!

Love,
Mrs. Fosson

Sunday, August 19, 2012

Rustic Artisan Potato Bread

I.  Love.  Baking.
And I especially love baking bread on Sundays . . . even when it is a thousand degrees outside.  Anyway - nothing is better than a slice of warm, freshly homemade bread.  The problem isn't the complexity of ingredients, as most breads are flour, yeast, salt, water, and oil - but the time it takes to make the bread.  So my itch for fresh bread needed scratching and I was displeased with most of the blogged bread recipes I found, so I went back to the old faithful cook book: Baking with Julia.
As I rummaged through the pages of this well loved book on baking, I noticed a particular bread recipe that had my mouth salivating instantly and my time constraints grinning ear-to-ear.  Rustic Artisan Potato Bread!!  Now, first things first - I freaking love potato bread!  But it always seemed complex to me - whole, hard, round potatoe - soft, fluffy loaf of bread . . . doesn't make sense right?! . . . WRONG.  Potato bread is almost comically easy, and the rise time is nothing in bread-rising-time.  But enough of my jibber-jabbing and on to the baking!!

Prep time: 30 - 40 minutes
Rise time: 40 - 60 minutes
Bake time: 40 - 50 minutes

I know what you're thinking . . . 2 hours?!  But believe me, after making a focaccia that had a 16 hour rise time - this was nothing.  And the amount of flour it calls for is next to nil!  The bread is soft and fluffy on the inside, and crisp and crunch on the outside. Oh! It's so perfect :)

If you're still not convinced, here's a preview:


Ingredients

1.5 lbs of potatoes (about 3 if you're using russet - if you're using any other kind . . . like I did . . . you'll have to find a way of measuring out 1.5 lbs)
4 teaspoons salt
1/2 cup tepid reserved potato water (80 degrees F to 90 degrees F)
1 Tablespoon active dry yeast
2 Tablespoons EVOO
4 -3/4 cups unbleached all purpose flour

Cooking the Potatoes
Thoroughly scrub the potatoes as well as you can and quarter them.  Boil the potatoes with the peel on (this is why you thoroughly scrubbed, remember!) and 2 of the Tablespoons of salt until they're soft enough to be easily pierced with a knife.  Save 1/2 cup of the hot water and set aside for later.  Strain the remaining water from the potatoes and set out on a towel to cool and dry.  It's really important for the potatoes to be completely cool and completely dry.  If they are still pretty moist it'll add extra water to the bread which can cause for disaster.  Let them sit for 20 - 30 minutes.


Making the Dough
A little instagram action going on :)
Once cooled, add the potatoes to a stand-mixer and, with paddle attachment begin to mash on low speed.  Simultaneously add the yeast to the tepid water (can reheat in microwave for a few seconds if need be) and let sit for five minutes -- it will look quite frothy and creamy.  Add the potato-water-yeast mixture to the mashing potatoes.  Add the olive oil shortly after the yeast mixture.  Continue to mix until potatoes are thoroughly mashed and liquids are fully incorporated into the potatoes.
At this point you'll need to replace the paddle attachment with a dough hook.  Continuing at low speeds, add the flour and remaining salt in parts.  Mix on low for about 3 minutes.  Increase the speed and mix for 11 minutes.
The dough will go through stages.  It will be unnerving at times, but trust me - it'll work out.  At the end, the dough will be transformed into a soft and slightly sticky blob of potato-dough.

First Rise

  1. Cover the mixing bowl with plastic wrap and allow to rise for 20 - 30 minutes.
  2. While the dough is rising, position an oven rack at the bottom of the oven and place a baking stone (or baking sheet)
  3. Prepare a floured workspace and prep a flour a towel for the final rise
  4. Fill a spray bottle with water and set aside
Shaping the Dough
We had some, freshly sliced with dinner
  1. Turn the bread onto the lightly floured surface and divide into two approximately equal parts
  2. Shape each half into a ball and press into a flat disc
  3. From the far side of the disc, roll the dough toward you, stretching it gently and continuing to dust the edges with flour
  4. If necessary, roll the dough back and forth seam side down to create a football like shape
Second Rise
  1. Place the shaped dough, seam side down onto the floured towel and wrap with remaining towel or new towel for another 20 minutes
Baking
  1. After the second rise, the oven and stone should be completely preheated.  Spray the walls of the oven with the squirt bottle and close immediately to trap the steam.
  2. Transfer the breads to the baking stone, seam side up and spray the oven once more.
  3. Bake the loaves for 40 - 50 minutes or until the bread has a nice golden brown tone and the bottom sounds hollow if you knock on it.  Spray the oven every 10 - 15 minutes or so with the spray bottle to keep the oven moist and help the bread cook more evenly without burning.
  4. Let the bread rest for 10 minutes or so
  5. Lather with butter
  6. Enjoy!!!


Storing
  1. Store at room temperature
  2. Once cut, place the cut side face down on a cutting board.
  3. It will keep at room temp for about two days and can be frozen in an airtight tupperware for up to a month.  When thawing keep in airtight tupperware until completely thawed

Thanks for stopping by!!

Love,
Mrs. Fosson

Thursday, August 16, 2012

Homemade Pesto

The other day I got a hankering for some green sauce.  I love my tomato-based and cream sauces, don't get me wrong - but I wanted to feel a little healthy, and so I decided to go homemade on the sauce and do it myself!

To be honest, I was really excited.  This recipe always comes out perfect!  It definitely did not fail me this time!
Pesto by the Food Processor Method

Ingredients


  • 2 cups tightly packed fresh basil leaves
  • 1/2 cup EVOO
  • 3 Tablespoons of pine nuts  --  pine nuts are expensive, I used part pine nuts part sunflower and it was one of the best pestos I've ever had.  I'm sure a little pistachio would be delightful as well.
  • 2 garlic cloves  --  or more if that's how you roll
  • Salt to taste
  • 1/2 cup of grated parmigano-reggiano cheese
  • 2 Tablespoons of grated romano cheese
  • 3 Tablespoons of butter, softened  --  NOT MICROWAVED
Instructions
  1. Soak and wash the fresh basil in cold water for a few minute and thoroughly but gently pat it dry
  2. In a food processor, process (duh) the garlic until thoroughly minced
  3. Add basil leaves and pine nuts to the minced garlic and process until thoroughly mixed
  4. Add olive oil and salt to taste, process a few more seconds
      1. It's pretty important to taste test the pesto at this point to see if you want it saltier, nuttier, or more liquidy
  5. Scrape the garlic, basil, nut, and oil mixture from the processor and into a bowl.
  6. Add the two cheeses to the mixture
  7. Once the cheese is thoroughly incorporated, add the softened butter and mix until the butter is no longer visible.
 Voila! Here you have a creamy, delicious pesto!  Personally, I recommend "cooking" the pesto in the hot pot with the strained pasta before eating it, or adding a tablespoon or two of the water from the pasta to the pesto when mixing into the ingredients.  I like garlic, but sometimes too much raw garlic can really make you wreak . . . if you know what I mean :)

Now, for those of you with husbands children who don't eat vegetables, the green pesto is the perfect way to incorporate mild flavored green veggies into their diet.  Be careful with spinach as it can taste bitter, add in only a little bit when you make it until they get used to the taste then you can add a little more each time.  The same goes for any other vegetable.  Zucchini is a really good one to mix in there.  If you process it simultaneously with the garlic it'll end up entirely unnoticeable.  Again put in a little at first, and build each time you make the recipe.  It's kind of like building taste immunities.  Then when they actually have the vegetable, they may begin to like it more . . . but not understand why :)


Thanks for stopping by!!

Love,
Mrs. Fosson

Tuesday, August 7, 2012

Not-So-Homemade Pop Tarts

So for the little miss, not-so-homemade homemakers out there, this recipe is perfect for you!  It'll make you feel like you're the queen bakestress of the house (yes, my jokes are lame).  But the best part is, for those of you who die to do everything by hand . . . you can!

This recipe (if done the not-so-homemade way) literally tastes like you're a know-it-all baker with practically no mess.  I'll provide recipes for both.


Not-So-Homemade Pop Tarts
Crust
  • 1 box of uncooked pie crust (Pillsbury is my favorite, but you can use any brand -- store brands included!! -- so long as it is uncooked and chilled)
  • 1 egg, beaten
Filling
  • 1 jar of Jam/Jelly OR
  • Cinnamon & Brown Sugar Mix (5 TBSP brown sugar, 5 tsp granulated sugar, 3/4 tsp cinnamon) OR
  • Nutella OR
  • Any other filling you think sounds delish

Instructions:
  1. Preheat oven according to the refrigerated dough's instructions
  2. Pull dough from refrigerator
  3. Unroll dough until it is laying flat
  4. Cut the dough into 3x4 inch rectangles (or whatever side you want, really) and place in pairs
  5. Place about one tablespoon of the filling into the center of half of the rectangles (this amount will vary depending on the size of your rectangles)
  6. Place the filling-less rectangle on top of it's other half and press down the edges first with your finger, and then with a fork.
  7. Lightly coat the top of the un-cooked pop tart with the beaten egg and sprinkle with sugar
  8. Bake according the the refrigerated dough's instructions or until light golden brown
  9. Enjoy!
They're best if you eat them fresh, but there is nothing wrong with refrigerating and retoasting these beauts.


Homemade Pop Tarts
Crust
Now for this I'm just going to say to go ahead and make your favorite pie crust.  There are certain recipes I share, but everyone has their secret recipes, and mine is my pie crust.  I've labored diligently to prevent the secret from ever leaving my recipe cards, and proud of it!  But just to be nice and convenient, here is a good and simple pie crust recipe:
  • Ingredients
    • 2-1/2 cups all-purpose flour, plus extra for rolling
    • 1 cup of unsalted butter or vegetable shortening (Crisco)
    • 1 teaspoon of salt
    • 1 teaspoon of sugar
    • 6 to 8 Tablespoons of cold water
Directions
  1. Combine flour, salt, and sugar in a large bowl and mix thoroughly
  2. Slowly cut in the butter/shortening with a pastry blender, two knives, or a food processor until the mixture resembles a bowl of peas.  The flour will be completely covering the pea-sized chunks of butter and will not be one big dough ball.  It is supposed to look chunky and unmixed.
  3. Add water by the Tablespoon to the butter/shortening-flour mixture until a large sticky ball of dough is formed.  The dough should look a little marbled (you can see chunks of butter/shortening)
  4. Wrap in plastic and refrigerate until ready to use
Filling
At this point in my life, I don't know how to make Jam.  I am currently fine with this.  So if you're looking to make homemade strawberry pop tarts, click here for a Jam recipe or use your family favorite.  You can trust the link, I gave you Food Network's oh-so-famous Ina Garten, who if you don't know her, is a royalty in the kitchen.
I love brown sugar & cinnamon, and it's really easy to do yourself with relatively little mess:
  • Ingredients
    • 5 Tablespoons of brown sugar
    • 5 teaspoons of granulated sugar
    • 3/4 to 1 teaspoon of cinnamon
Directions
  1. Combine three ingredients in a bowl until well mixed, set aside

Homemade Pop Tart Assembly
  1. Remove chilled dough from the fridge and let sit for five minutes
  2. Preheat the oven to 375 degrees
  3. While the dough is sitting, prepare a large flat surface for rolling the dough.  Dust the surface with flour, and keep enough close by to flour the dough and continue adding to prevent the dough from sticking.
  4. Divide the dough into two equal parts
  5. Place on half of the dough onto the floured work surface and roll into a 9 x 12 inch rectangle about 1/4 to 1/3 inch thick, trimming the sides to create squared edges.
  6. Using a ruler divide the dough in half lengthwise
  7. Using the same ruler, divide the dough again in quarters to create eight 3 x 4 inch rectangles
  8. Repeat steps 4 - 6 with the other half of the dough
  9. Prepare a baking sheet by lining it with parchment paper
  10. Separate eight of the 3 x 4 inch rectangles by about an inch or so on the prepared baking sheet
  11. Place 1 Tablespoon of the brown sugar mixture into the middle of each rectangle
  12. Place the other eight 3 x 4 rectangles over the brown sugar mixture rectangle and press down with fingers, sealing off the pop tarts
  13. Using a fork, press down on the edges to really shut them off and to make them look cute
  14. Lightly brush the tops with the beaten egg
  15. With the same fork as before, press a couple holes into the top to let the steam out as the pastry cooks
  16. Bake for about 20 minutes, or until golden brown
  17. ENJOY :)
Thanks for stopping by!!

Love,
Mrs. Fosson

Sunday, August 5, 2012

Baking Powder

I am so stoked to share this right now, it's not even funny.

Ok I'm going to give you a little worst-case scenario to you and proceed to solve the problem!
You've been eying a recipe for a few weeks and finally decide to make the cake/muffins/whatever-craving you've been denying.  You're 90% of the way through your recipe when . . . dun, dun, DUUUUUN --- you have zero baking powder.  Obviously someone stole it because a staple like that would never ever leave your baking kitchen.  So what do you do? . . . well my friends.  Because of my excellent baking knowledge A+ googling skills, I am proud to pronounce you baking powdered.  After you finish reading this post, you will never be without baking powder again!

So what do you do when you mistakenly forget to buy more baking powder?  Simple -- seek out your pantry for baking soda and cream of tartar!  I just about cried when I found the answer to my baking powder problems.  Combine one part baking soda with two parts cream of tartar, make sure their mixed well, and voila!  Welcome to baking powder heaven.

To write it out more clearly:
1 teaspoon of baking powder + 2 teaspoons of cream of tartar = 3 teaspoons of baking powder.

I've actually used this in a muffin recipe, and it actually works!

Good luck!

Thanks for stopping by!!

Love,
Mrs. Fosson

Saturday, August 4, 2012

The Good, The Bad, & The Delicious


So here's the deal, I am infamous for making millions of blogs.  This being said, I am also infamous for never posting.  And as many times as I say, This time it's different! . . . Alas it never is.  That's why I'm starting this blog out on the premiss that, yes I am a terrible blogger, but you know what? It's ok!  Blogging, for me, isn't really to update the outside world, but to chronicle my doings in life.  The reason I justify the creation of this blog, is because a girlfriend's gotta keep all her recipes in one easy to find place!

So now you've heard the good and the bad (kindof).  Make room for the delicious!  After all, that is what this blog is about :)

Mrs. Fosson's Homemade Banana Chocolate Chip Drop Cookies
Disclaimer: this recipe is an adaptation from a multitude of blogs.  One of my best friend's has a secret family recipe for banana chocolate chip cookies and no matter how I begged, she would not give.  So I did the next best thing and googled my heart out!

1/2 cup butter, softened
1 cup sugar
2/3 cup to 1 cup mashed ripe bananas
2 whole eggs
1-1/2 teaspoon vanilla
1/2 teaspoon banana flavoring (very optional)
2-1/2 cups flour
1/2 teaspoon baking soda
1/2 teaspoon salt
Chocolate chips - add as many as you would like.  Everyone has a different chocolate preference.  I'm not a terribly chocolatey person, so I would stick to 3/4 cup max.  But for some people that is simply not enough!

Preheat oven to 375 degrees.

Prepare a cookie sheet lined with parchment paper or with one of those amazing silicone baking mats (literally one of the best inventions ever made).

  1. In a kitchen-aid mixer, or in a bowl, cream butter and sugar until nice and fluffy.  
  2. In a separate bowl combine baking soda, salt, and flour.  Tip on flour: take a fork to it!  Before scooping out your perfectly leveled 2.5 cups of flour, take a fork and mix it around in the bag or container.  This mixes air into the flour and "fluffs" it up.  This helps for lighter and fluffier baked goods.  Despite how important I know it is to sift flour, I typically just stick with this step.  Now if you want A++, jus take the time to not only pre-fluff, but sift as well.
  3. Once the buttery-sugar mixture is soft and creamy, mix in the eggs one at a time until well mixed.  Then add the vanilla.  In the opinion of this little baker - you can always add more vanilla!  But that's just me :)  This would also be the step where you would add the banana flavoring.  Now, I didn't do it this time, but I have done it before.  Don't be afraid of extracts and flavorings!  They can make yummy things exceptionally yummy if you bake with certain flavors quite a bit.
  4. Mix in the mashed bananas.  Now here is my little tip on this one -- don't mash the bananas until just before  you're ready to add them to the mixture!  Bananas turn brown quite rapidly after mashing and in order to keep the beautiful light yellow color you know you want to see, I recommend you leave the thorough mashing to moments before mixing :)
  5. Combine wet and dry ingredients in parts until smooth.
  6. STOP THE KITCHEN-AID.  Take your rubber spatula, and fold in the chocolate chips, being careful not to over-mix
  7. Drop by spoonful onto the prepared cookie sheet (or two).
  8. Bake for 8 - 10 minutes, or until the bottoms are golden.
  9. Remove from oven and place on a wire rack to cool
  10. ENJOY :)  These cookies are exceptionally good frozen as well -- just so you know!  In fact, I prefer them that way.  So maybe when you feel like eight cookies was too much to eat at once, but you can't seem to keep yourself cookie-free, take your tupperware fill it with cookies, and freeeeeeeeeeze.
Just take some time and enjoy these on a hot day.  You won't regret it, I promise :)

Thanks for stopping by!!

Love,
Mrs. Fosson